Tips
How to save battery life of your Samsung Galaxy Note 20 or Note 20 Ultra

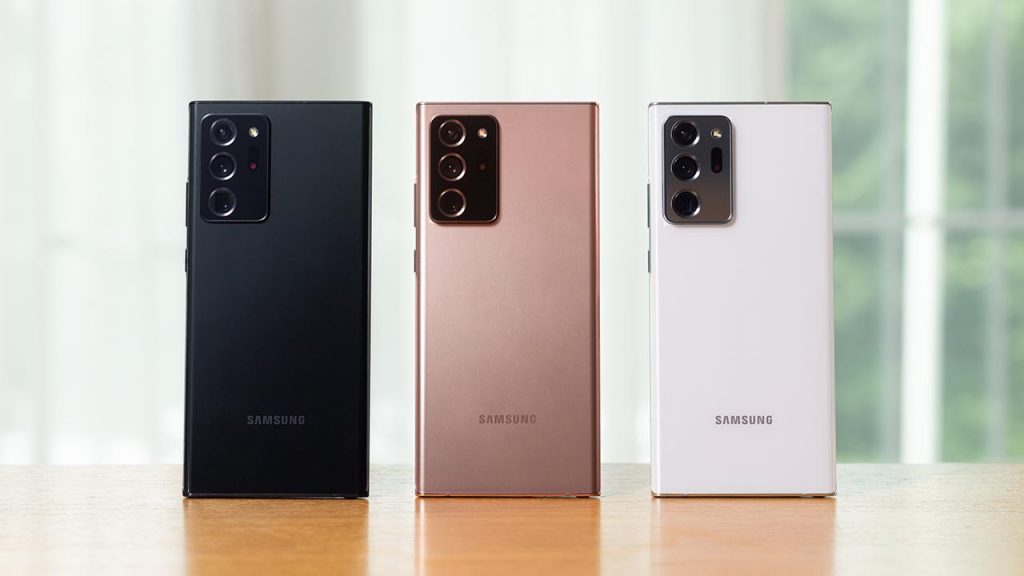
Samsung Galaxy Note 20 series is more than ever a meaningful device that helps people create, and connect more easily so they can work, play, and stay in touch with everyone from anywhere.
The Note 20 series is making adapting to the next normal even easier by building on the heritage of the Note 20 series and delivering a unique experience designed for users that want to get more done and enjoy premium entertainment in the palm of their hands from anywhere they desire.
Similarly, Samsung also offers the Galaxy’s High-quality, High-performance Battery. Every Samsung mobile device is equipped with a high-quality to strengthen your Galaxy experience.
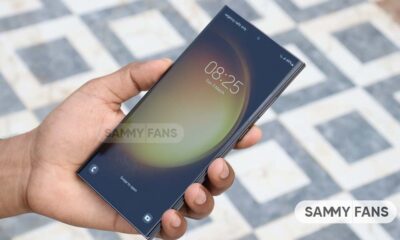
In terms of battery capacity, Samsung Galaxy Note 20 equipped with a 4300mAh and Galaxy Note 20 Ultra has 4500mAh battery life.
Read More: Samsung Galaxy S10 series One UI 3.0/Android 11 update status
You can check battery information such as how much time is left on your battery, switch to Power Saving Mode, or set app permissions to run in the background by going to Settings > Device Maintenance > Battery.
The tips below will show you how to get the best out of your Samsung Galaxy Note 20 series battery in everyday usage.
Adjust display settings
Adjusting the display setting in Galaxy Note 20 series to the long screen time-out settings or high display brightness can substantially reduce battery time.
Lower your brightness setting by pulling down the notifications menu and using the slider to adjust the brightness. You shouldn’t need full brightness unless you are outside in direct sunlight.
Brightness
- Go to Settings,
- Then tab to Display.
- Adjust the slider until you reach your desired brightness.
Reduce the screen refresh rate
A higher screen refresh rate such as 120Hz, allows you to enjoy an enhanced experience while reading articles, watching movies, and playing games. On the flip side, it also consumers a massive amount of battery life to give you a perfect graphics performance. However, turning off the high refresh rate could help you to greatly reduce the power consumption and provides you more long battery performance.
Adjust the refresh rate
- From Settings, search for and select Motion smoothness.
- Tap Motion smoothness again, and then choose your desired option.
- Standard refresh rate – 60 Hz refresh rate, use this if you want to save your battery life.
- High refresh rate or Adaptive – 120 Hz refresh rate, which will have all the benefits we discussed.
Note: 120 Hz refresh rate is not supported on WQHD+ resolution. If you switch to this resolution, the refresh rate will drop to 60 Hz.
Reduce Display resolution:
Similar to a Higher refresh rate, Samsung Galaxy Note 20 Ultra also comes with Quad HD+ resolution, which allows you to watch content in high quality but it also takes a big part of Note 20 Ultra’s battery life.
- Swipe down the notification panel and tap on the Setting icon.
- Scroll down and tap on Display.
- Tap on Screen resolution.
- Choose resolution:
- HD+ (1544×720)
- FHD+ (2316×1080)
- WQHD+ (3088×1440)
Turn off Always On Display (AOD) or set schedule
Always On Display or AOD uses AMOLED displays to show you certain information when your screen is ‘off’. It allows you to easily check basic information such as date and time without activating the display.
Naturally, any activity that makes your screen turn on all the time will consume some power from your battery. You can choose to turn off AOD or set a time schedule for AOD to turn on/off.
To turn off AOD:
- Go to Settings > Lock screen and security > Lock screen and Always On Display.
- Turn off AOD by tapping on the AOD slider.
Power Saving Mode
Your device has a Power Saving Mode. Power Saving Mode differs slightly between devices but generally, it will close all unnecessary apps and screens so that you can essentially increase your battery time.
To enable Power Saving Mode in Note 20 series, follow the below steps:
Medium power-saving mode
- From Settings, search for and select Battery.
- Tap Power mode and then tap Medium power saving, review the mode’s settings, and then tap Apply.
Maximum power-saving mode
- From Settings, search for and select Battery.
- Tap Power mode.
- Then tap Maximum power saving, review the mode’s settings, and then tap Apply.
Optimized power-saving mode
- From Settings, search for and select Battery.
- Tap Power mode, and then tap Optimized.
Device data synchronize
Samsung Galaxy consists of a number of apps. Out of that, email, or social media, these apps will frequently sync, or check for new emails or updates. Frequently syncing can reduce your battery life.
To check the sync settings in Galaxy Note 20 series in your apps or email, and ensure they only sync as often as you need them to.
Disable Auto Sync
- Go to Settings.
- Choose Cloud and accounts.
- Choose Accounts.
- Tap three dots for more options.
- Tap Disable auto-sync to turn off auto-sync of all accounts.
Number of signal bars
If you use your device for long areas of poor response, your device will use more power to communicating with your network operator.
The use of mobile data in areas with a low signal can use a lot of power. Switch off mobile data if you are running short of battery and don’t need it.
Wi-Fi, Bluetooth, and GPS
Switch off Wi-Fi, Bluetooth, and GPS if you don’t need them, as each regularly checks for a signal which uses power.
You can switch each of these off by pulling down the drop-down menu and tapping the relevant icon.
Apps and Multimedia
Apps and content that keep the device awake over an extended period of time can quickly drain the battery (e.g.playing games or watching movies). Some apps are particularly power-hungry, especially if they use features like GPS.
Ensure you close apps when not in use, and if you are out and about and using apps that you know are power-hungry, consider investing in a rechargeable battery pack if you do not expect to have anywhere to charge your device.
Charging your device in the right way
If your battery is charging slower than you expect, make sure you are using the right charger as the amperage on chargers can differ.
– Always use an official Samsung charger, preferably the one that came in the box. If you need to replace your charger, check that the amperage of your new charger is appropriate for the model of your device.
– The power output of where you plug in your device will also affect charging time. Charging your device directly from a power outlet will charge it faster than if you plug it into your laptop.
Minimize hot and cold exposure.
Extreme heat and cold can damage your battery. And continuous use or charging in extreme temperatures may accelerate battery temperature. Samsung’s battery is designed to perform best at 0°-35°C.
Battery saving mode
- From the Home screen, swipe up on an empty spot to open the Apps service.
- Tap Settings > Device care > Battery.
- Tap Power mode then selects from the following:
- High performance
- Optimized
- Medium power saving
- Maximum power saving
- Tap Adaptive power saving to turn on / off.
Some more tips to save battery life
- Turn off background data.
- Turn off Wi-Fi, Bluetooth, GPS, and Smartphone Mobile Hotspot.
- Uninstall unused apps.
- Update to the latest software.
Set device to sleep when unused
- Press and then quickly release the Power key to set the screen to sleep mode.
Quick optimization
The quick optimization feature improves device performance through the following actions:
Optimized: Get the recommended balance of performance and battery life.
Medium power saving: Extended battery life by limiting some functions.
Maximum power saving: Save as much battery as possible. You can also access more battery options by touching More Options and then touching Settings. Touch Battery usage to get a detailed report about your usage record.
- Identifying apps that use excessive battery power and clearing unneeded items from memory.
- Deleting unnecessary files and closing apps running in the background.
- Scanning for malware.
To use the quick optimization feature:
- From Settings, tap Device care > Optimize now.
Want to send us Tips, Update Screenshots, or a Message? connect with us here:
- scr[email protected]
- Message us on Twitter


Icons are the most crucial part of the user interface. Everywhere we interact with system functions and applications, icons play a key role over the text guide. Samsung One UI already features neat and clean app icons across the user interface, but, you can also try out iOS-styled icons on your Galaxy device.
Follow our socials → Google News, Telegram, Twitter, Facebook
The One UI software doesn’t have the ability to alter the design or shape of the app and function icons. It becomes a disappointing thing for Galaxy consumers, but we have a cool way so you can turn app icons from a big hidden directory to choose from.
How to activate hidden customizer
First, open the Good Lock app, followed by the Theme Park application (if you don’t have these apps already, download them from Galaxy Store). Do note that the installation of Good Lock is necessary to get access to Theme Park, so don’t waste time bypassing steps.
Theme Park is the only way to alter icon design on Samsung Galaxy devices. One UI doesn’t allow you to easily change the shape, style, or layout of app icons, but Good Lock makes it possible. Theme Park could bring you what you want, but, it doesn’t work perfectly on all apps.
![]()
How to apply iOS-shaped icons
To apply iOS-shaped icons on the One UI interface, open the Theme Park application from Apps Screen. Navigate to the Icon tab through the bottom bar and hit that interactive “+ Create New” button.
Apart from the ability to download Iconpack through Galaxy Themes, the interface allows you to create your own iconpack using Shape, Icon Color, Tray color, and Size functions.
The pre-selected shape is the original One UI icon shape, while the second is circular, which looks a lot similar to Google’s stock Android experience. For iOS-shaped icons, you have to select the “fourth” option, and voila!
The large icons preview interface will display nine app icons so you can customize further before applying finally. After customizing the Icon color, Tray color, and Size, you have to hit the “↓” Download icon and give a name.
Put the name as per your preference and tap OK. After short processing, you will be redirected to the page from where you began the customization journey where you should see your own created Iconpack.
Now, tap on the icon pack you just created to apply to your phone’s by-default settings. Finally, hit the “Apply” toggle and let the Theme Park do magic and turn the shape of the original One UI icons to iOS-inspired.
Enjoy!
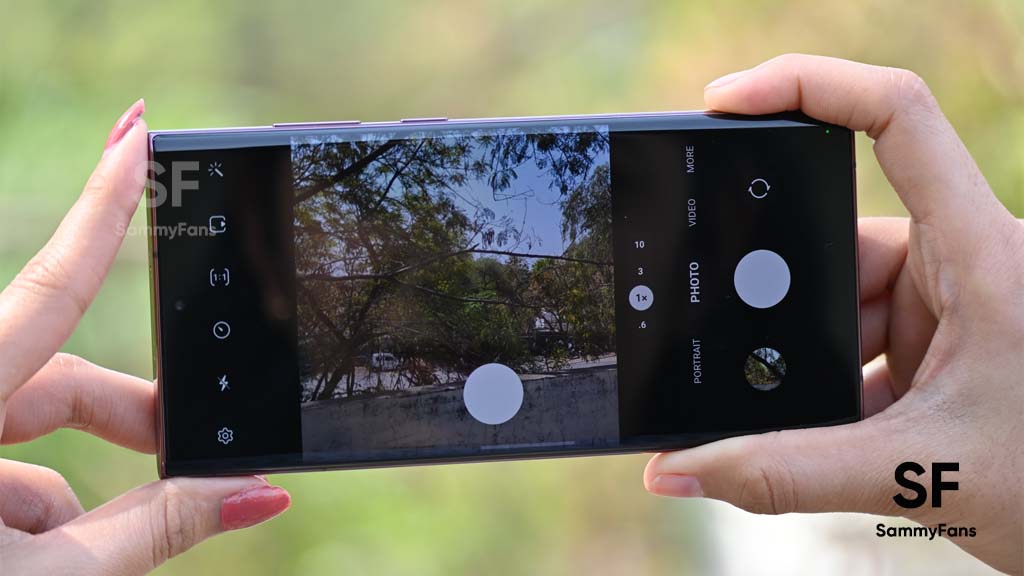
Samsung offers several features to let Galaxy customers manage and customize their phone’s camera. Meanwhile, Good Lock’s Camera assistant has some advanced features that provide more ways to manage camera settings as per your preferences.
It brings some useful features that you can drive to make your already strong Samsung camera stronger. It automatically switches the camera lens based on your surrounding so that you get the best of the present moment.
Follow our socials → Google News, Telegram, Twitter, Facebook
It also lets you prioritize between the picture quality and picturing speed, video recording in photo mode, shoot continuously at regular shooting intervals, and much more.
For photoholics, the Samsung Camera Assistant will be the best choice as it lets them capture their best shots with their phone itself. Here are some tips and tricks that will make it easy to use the Samsung Camera Assistant module:
How to use Samsung Camera Assistant:
All you need to have is a compatible Galaxy smartphone and Good Lock app installed in it. Now open the “Good Lock” app, visit its “Life up” page, and tap the download button beside “Camera Assistant.” The following options will appear:
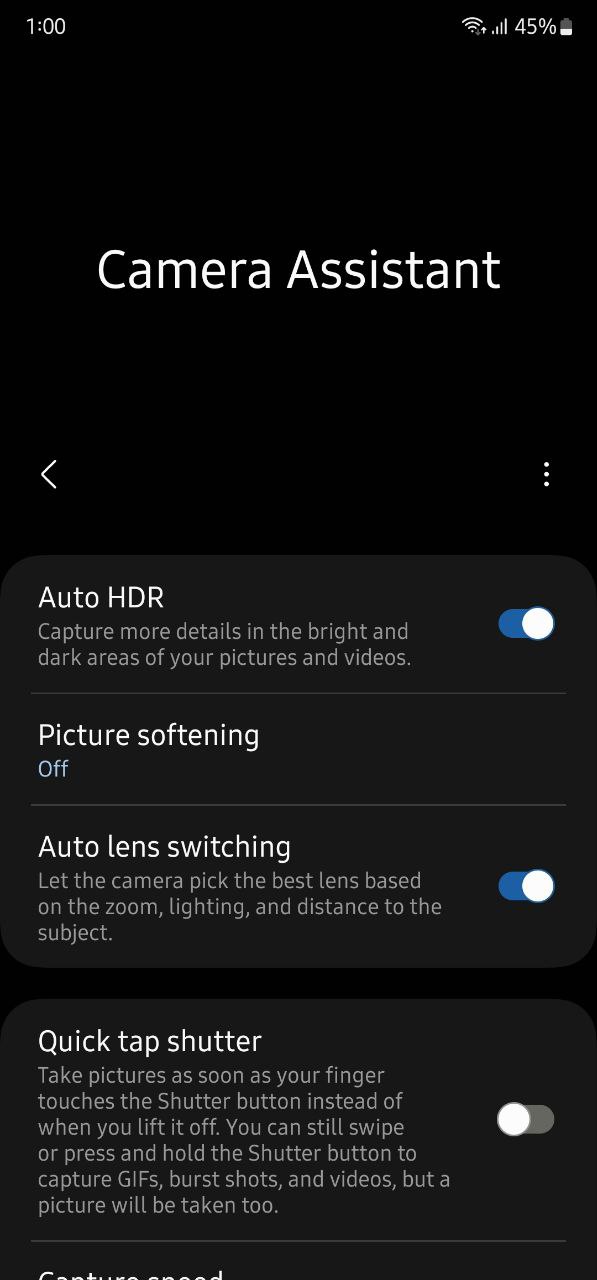
Auto HDR:
It is a feature that lets you capture more details in your pictures and videos in a bright and dark environment. To use it, all you need to do is just turn the toggle on.
Picture softening:
The picturing softening tools are available for customers who prefer a soft picture texture rather than the Galaxy camera’s default picture quality, which offers you pictures with detailed and sharp textures.
There are two softening tones to choose from – Medium and High. You can choose the one according to your preferences and if you are not a person who likes soft images, can simply turn it off.

Auto lens switching:
Once you turn the toggle of this feature on, your Galaxy phone will automatically pick the best lens based on zoom, lighting, and distance to the subject. This way, you can capture the best shots, no matter the time, place, or environment.
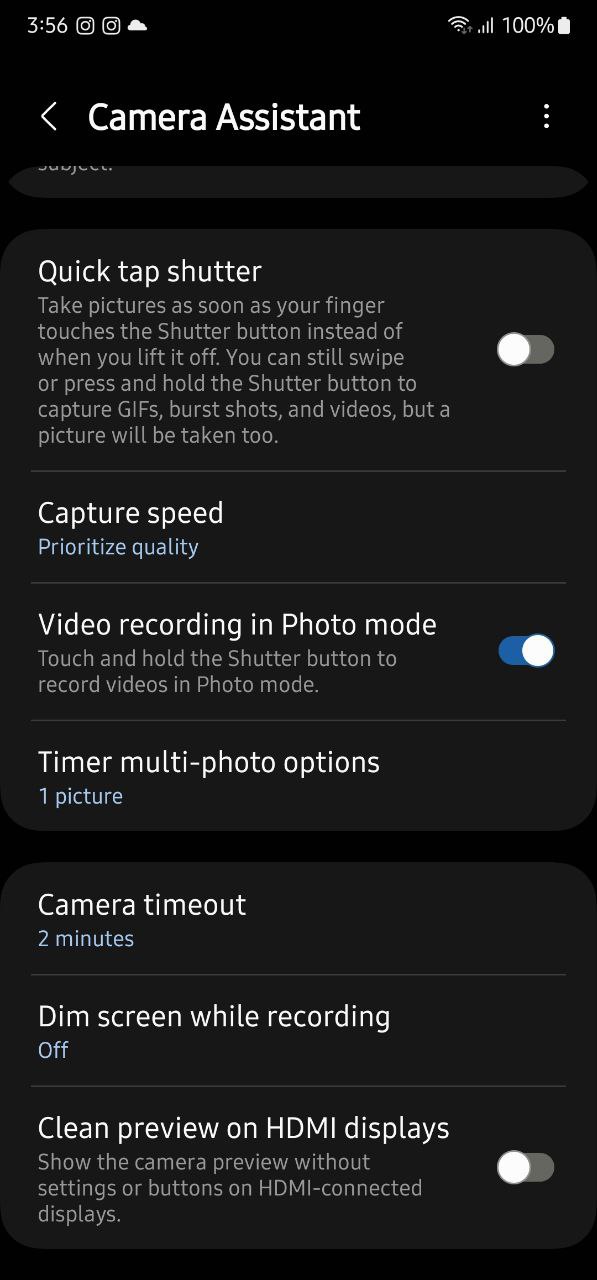
Quick tap stutter:
The quick tap shutter is a new addition to Camera Assistant that improved the users’ shooting experience. It lets you set a photo to be taken immediately the moment your finger touches the capture button, rather than the moment it realizes.
Capture speed:
This feature allows you to set the priority between image quality and capture speed. If you want to shoot quickly for capturing the moment rather than the quality you can try the “Prioritize speed” option.
Meanwhile, you can choose “Prioritize quality” for the best pictures or “Balance speed and quality” for faster capturing without sacrificing too much quality.

Video recording in Photo mode:
The name itself tells its use, it lets you record videos in photo mode. All you need is to touch and hold the shutter button to record videos after you have enabled the toggle.
Timer multi-photo options:
By default, the camera of your Galaxy phone takes one photo with the timer mode. But with this feature enables, you can shoot continuously at regular shooting intervals without having to press the shooting button again.
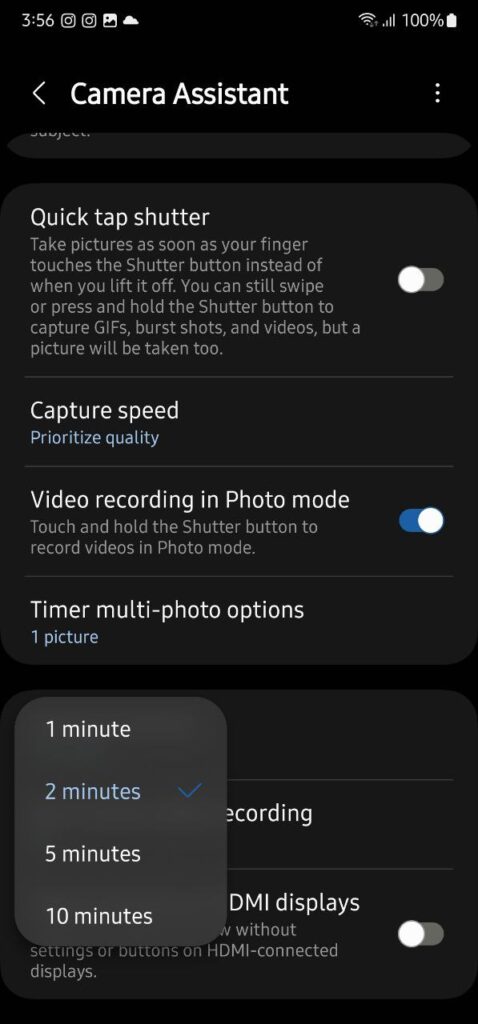
Camera timeout:
You can choose the camera timeout time here. Once you set it, your phone will automatically close the camera app. You can choose between – 1, 2,5, or 10 minutes options.
Dim screen while recording:
This feature will save the battery of your phone by setting the screen brightness to low when recording video for a long time.
Clean previous on HDMI displays:
Once turned on, this feature will show you the camera preview without settings or buttons on HDMI-connected displays.
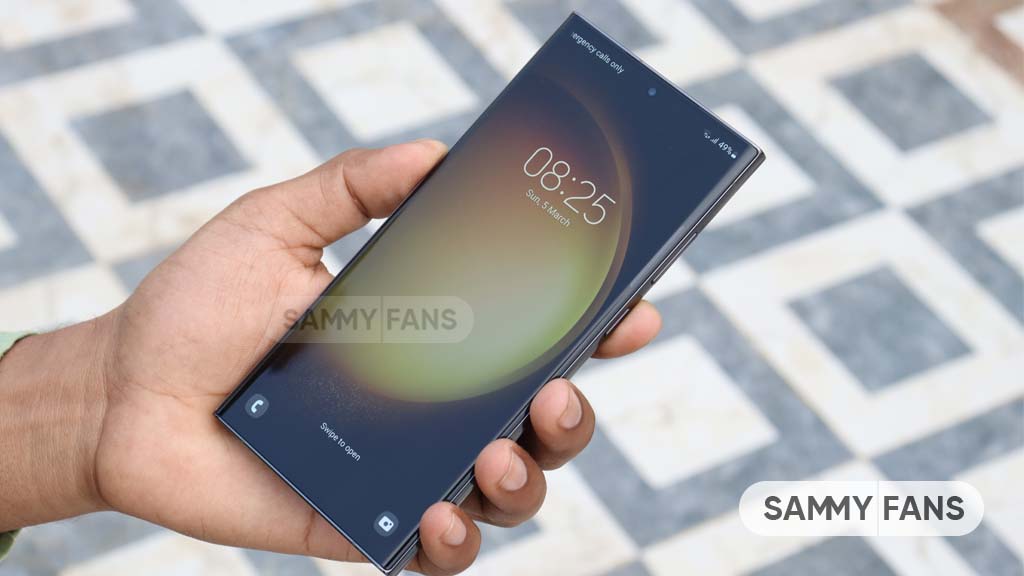
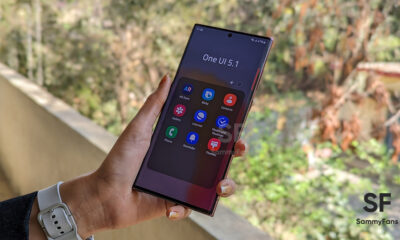
Introduced with the Galaxy S23 series, Samsung’s latest custom software – One UI 5.1 has reached millions of Galaxy users through OTA updates. It brings a lot of new features and improvements, meanwhile, this story talks about the Samsung Lock Screen features that you can use on your One UI 5.1 smartphone.
Samsung One UI is known for customization and it has some amazing Lock Screen customization options which let you do much more than just unlock your phone. You can add different app shortcuts, contact information, and widgets, as well as customize the clock, notifications, and much more.
If you are among the people who like to personalize their phones with different elements, you should definitely check out these eight smart One UI 5.1 Lock Screen features.
One UI 5.1 Lock Screen features
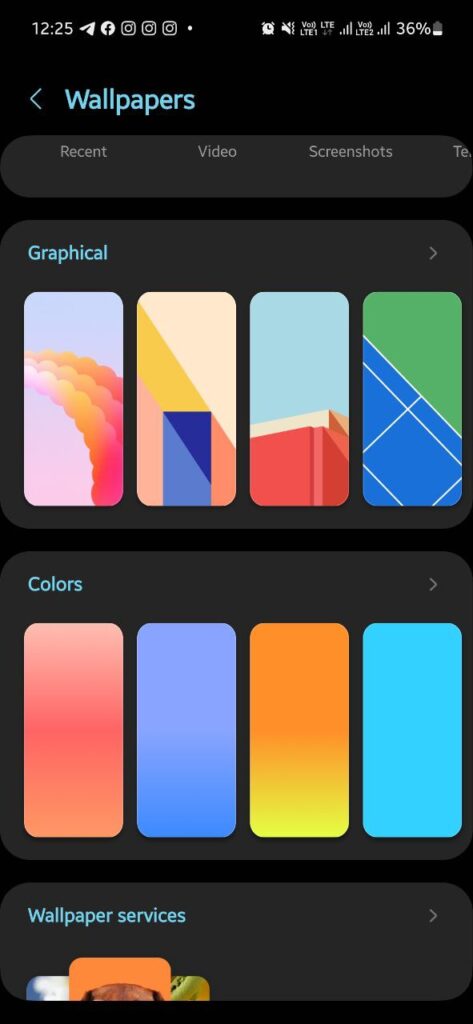
Change Lock Screen Wallpaper:
Tap and hold your phone’s lock screen to open a live preview of your lock screen. Tap the “Wallpaper” button in the top-left corner to change your lock screen wallpaper.
You can choose a wallpaper from one of the default categories on the following page, or select an image from your Gallery. Once finalized, tap the “Done” option to apply the changes.
Add filter to Lock Screen Wallpaper:
Samsung offers you a variety of filters that you can apply on the lock screen wallpaper. At the bottom of the Lock Screen preview, there’s a “Filter” option. Tap on it and you will see some great filters.

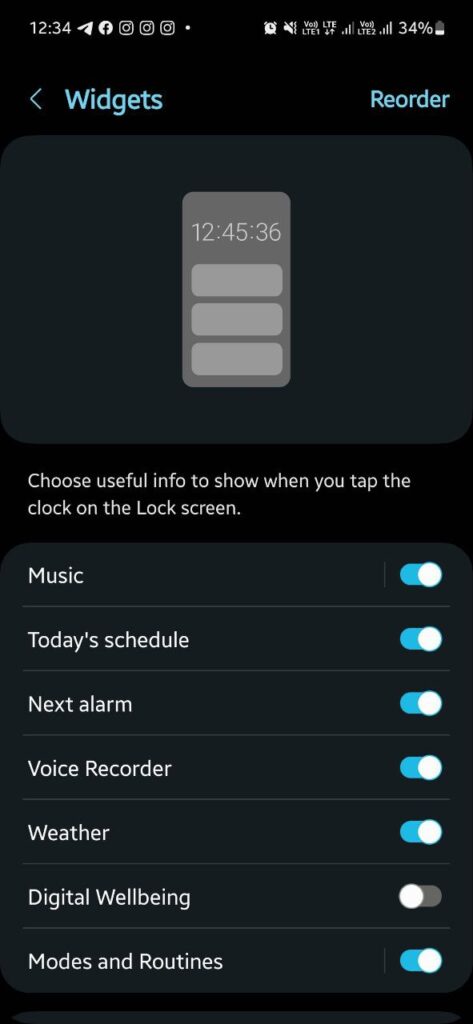
Lock Screen Widgets:
Head over to the “Lock Screen settings” on your Galaxy phone and tap on the “Widgets” option. Now simply, turn the “toggle on” for the widget you want to see on the lock screen.
You can also reorder the widgets by tapping the “Reorder” option in the top right corner. Simply, tap and hold the widget you want to shift and arrange them according to your preferences.
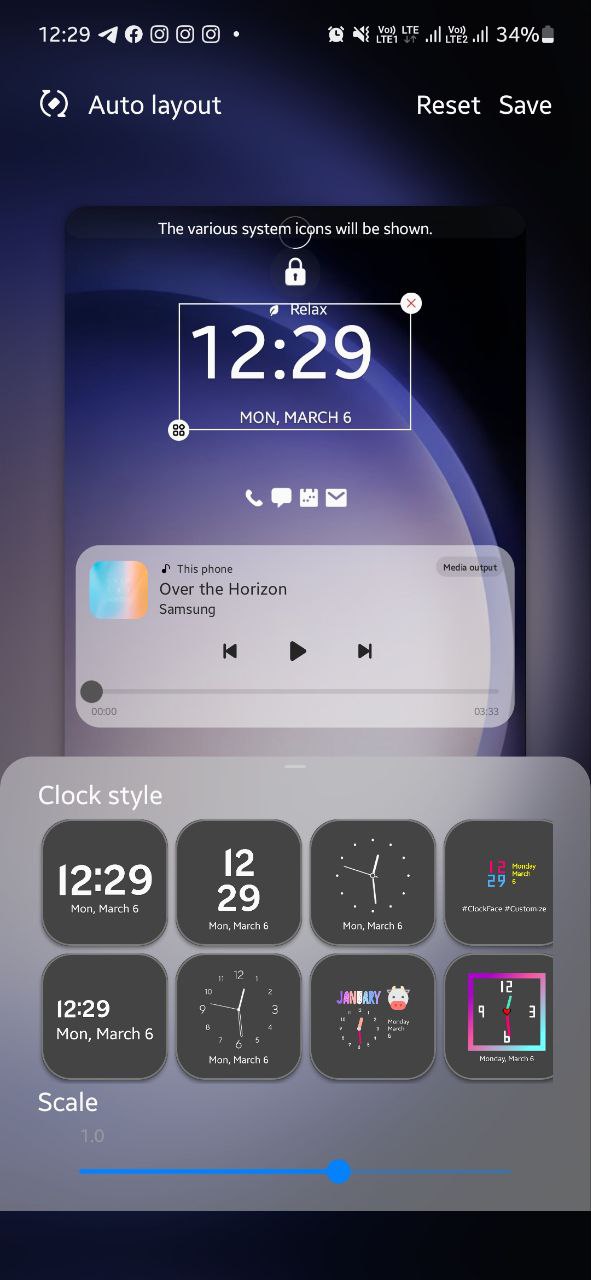
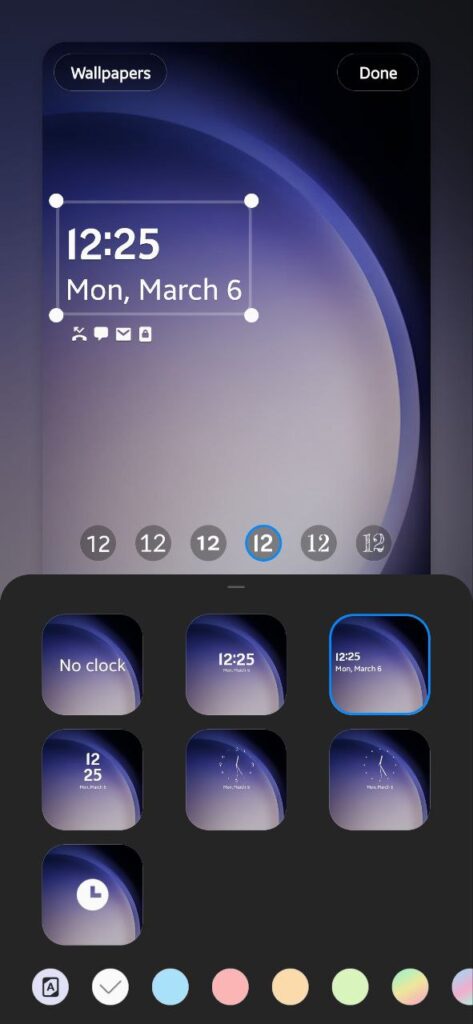
Personalize Lock Screen Clock Widget:
Tap the Clock Widget on the live preview of your lock screen to unlock customization options. Select one of the five analog and digital clock styles from the pop-up window.
If you choose a digital clock, you can change its font by tapping the six available options at the top of the pop-up window. You can also change the clock color from the bottom bar or let One UI automatically adjust the color based on your wallpaper by choosing the first option.
If you want, you can resize the clock widget by dragging one of the four corners. Once you are satisfied with the result, tap on “Done” to apply changes in real.
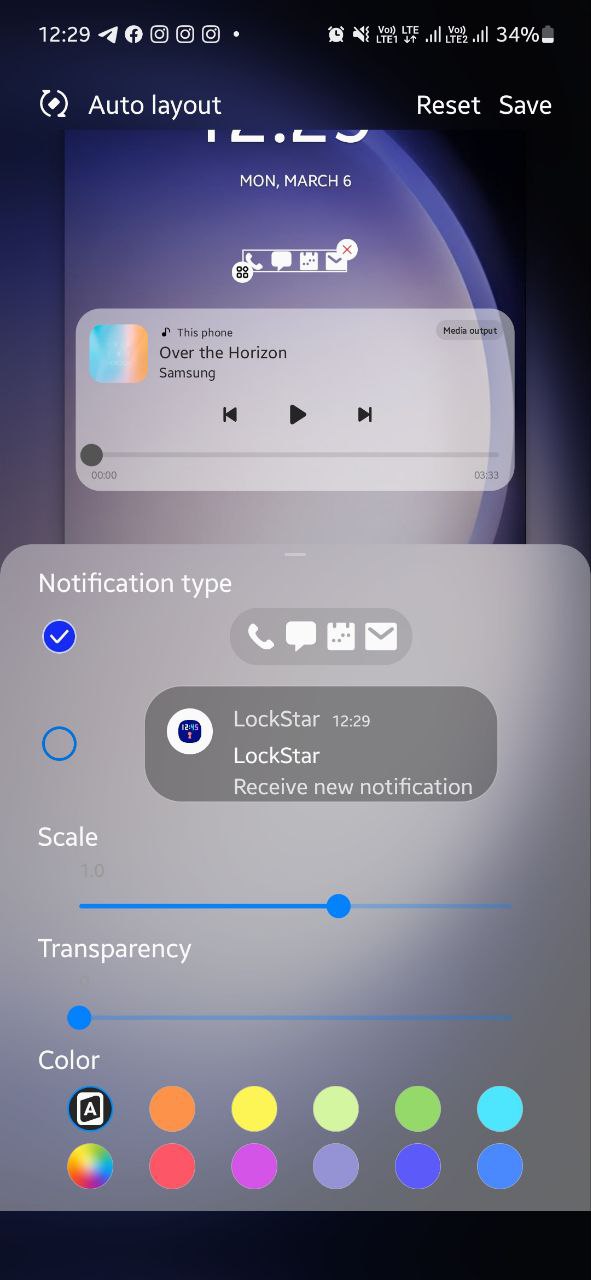
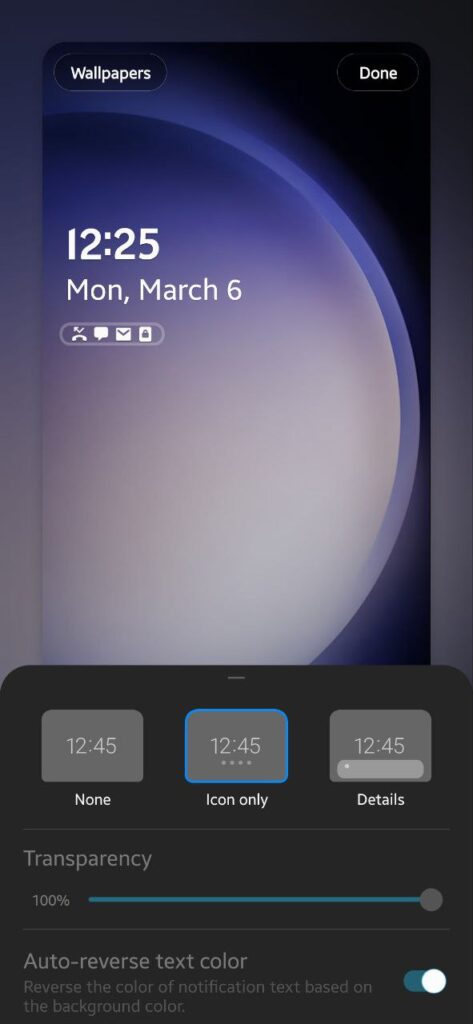
Customize Lock Screen Notifications:
On the live preview of your phone’s lock screen, tap on the Notification icons, and the customization options will appear. Select one of the three notification styles from the following pop-up: None, Icon only, or Details.
If you choose Details, the following customization options will appear:
- “Adjust the transparency” of the notification using the slider in the pop-up window.
- Enable the “Auto-reverse text color” option if you want One UI to automatically adjust the notification text color based on the wallpaper for improved visibility.
- Finally, tap “Done to apply your customizations to the lock screen.
Add Lock Screen Contact Information:
Again, open the live preview of your phone’s lock screen through Settings. Tap on the “Contact Infomation” option at the bottom of the screen. Enter the contact information you wish to display on the lock screen in the following pop-up.
You can add a phone number, email address, or others as well as add emojis to the text. For example, I wrote “SammyFans” with two Blue hearts. Once done, tap “Done”.

Lock Screen Shortcuts:
The Phone and Camera app icons that appear on the bottom corners of the lock screen are shortcuts. You can them if as per your preferences. To do so, open the Lock Screen settings and tap on any of the shortcuts.
You can select the app installed on your device as well as go for useful functions like Flashlight, Bixby wakeup, Do not disturb, and more. Do the same with another shortcut. Tap the “Done” option when completed.

Use Good Lock’s LockStar module:
If you are not satisfied with the above-mentioned stock lock screen customization options, install the Good Lock’s LockStar module for further personalization capabilities.
Open the module and enable lock screen customization on the following screen by tapping on the toggle in the top-left. Now tap on the lock screen to open a live preview with the customization features.
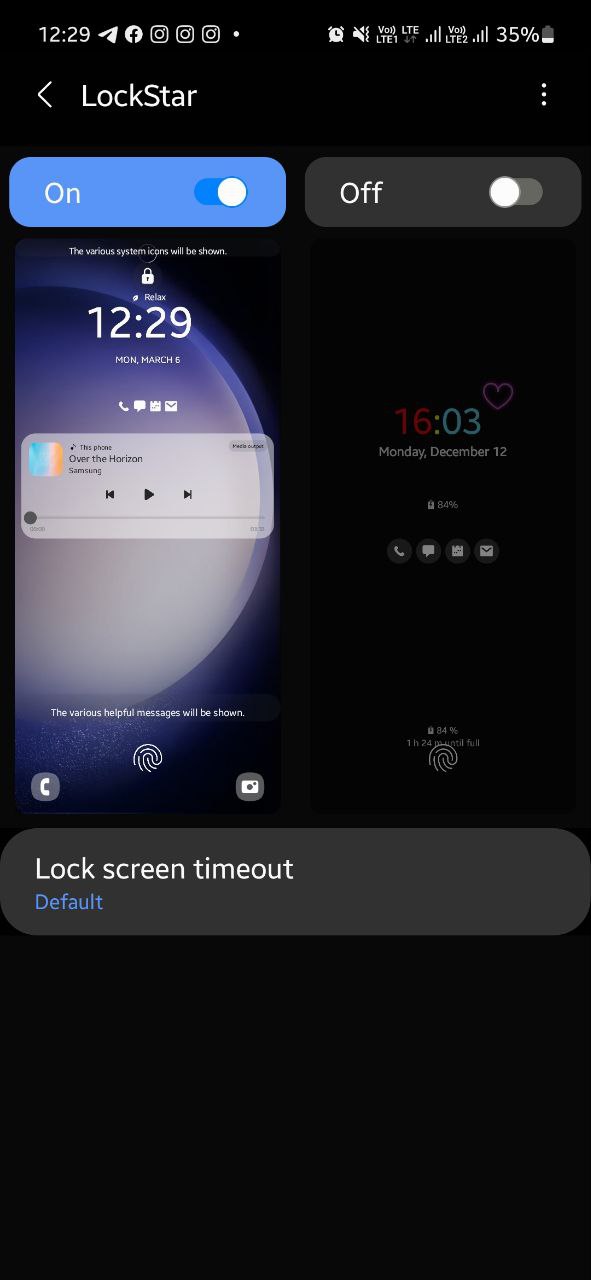

Here, you can select the element you want to customize and drag it anywhere on the screen to change its location. If you want, you can remove unwanted elements by tapping the “X” button in the top-right corner of the selection.
However, if you accidentally remove an element, tap the empty area in its previous position to open a pop-up menu including elements you can add to the area.


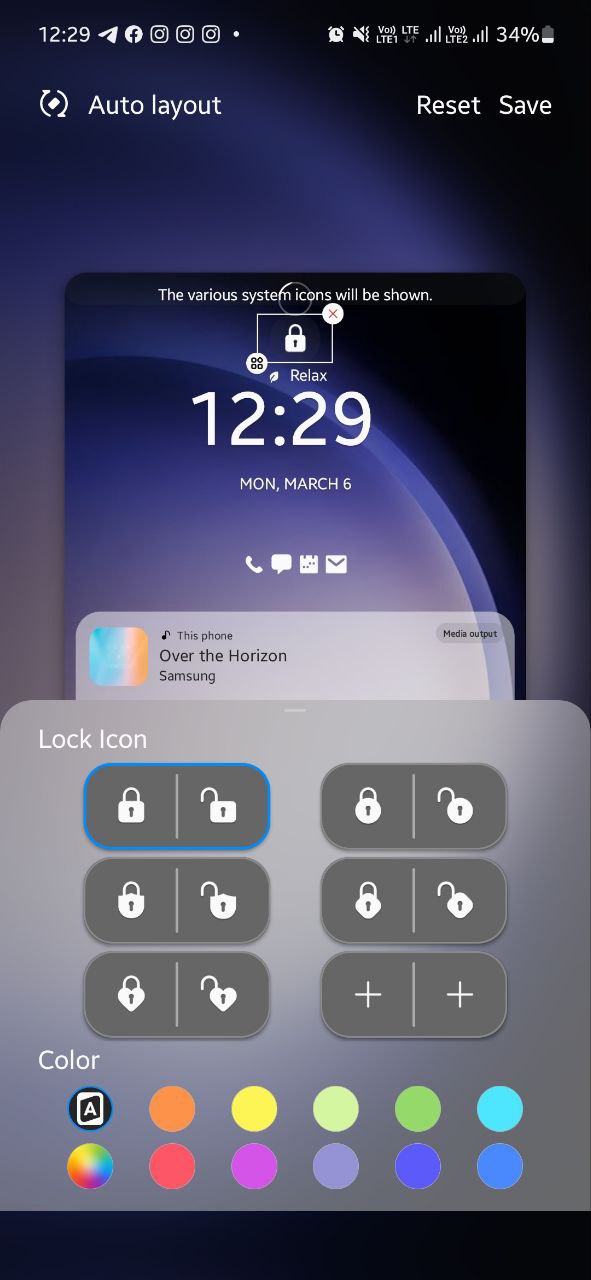
Change the appearance of the lock icon at the top of the screen, the clock widget, the shortcuts, or the toast by selecting the element and then tapping the icon with four squares in the bottom-left corner of the selection.
There are more Clock faces, the ability to add up to 6 app shortcuts, the ability to add Stickers, and more. After you complete the customization, select the “Save” button in the top-right corner to apply the changes.